A factory recall can turn into a headline in hours, and the bill can hit millions fast. In 2025 and 2026, companies across auto, food, and pharma saw huge pulls tied to production issues, from engine defects to pills that didn’t dissolve right. Sometimes it comes down to one thing missed on the line, even when the process looked fine.
That’s why workers follow quality guidelines every shift, not “when they have time.” When you follow the steps, you catch defects early, keep products safe, and reduce waste that comes from rework and scrap. In addition, you meet standards like ISO (and rules like FDA) because those guidelines make quality repeatable, even under pressure.
Quality also protects your job and your team’s trust. If you do things the same way, you spot trends, fix root causes, and keep the line moving without chaos.
Next, you’ll see how workers make quality checks part of the job, from training and daily inspections to the tools and tech that support the process.
Build Skills Through Hands-On Training
Training comes first because quality rules don’t help if you cannot see the defect or use the tool. In other words, you need skills that transfer from the classroom to the line, then hold up during real runs.
When you start with hands-on practice, workers learn what “good” looks like, what “not good” looks like, and what to do next. That early skill match also supports how companies manage risk, including the risk focus found in QMSR 2026 expectations for medical devices.

Spot Defects and Learn Standards Early
In initial training, I like to treat quality like a skill you build, not a rule you memorize. First, you show workers real examples of defects from the same product family they will run. Then you teach them the standards that define accept or reject.
Start with visual defect spotting. For example, put three parts on a tray: one within spec, one with surface damage, and one with a clear mismatch. Ask the trainee to point out what looks different before you label it. That simple step builds pattern recognition fast.
Next, move to measurement basics using the same tools they will use daily. If the job uses calipers, teach the full habit, not just the reading. Workers should learn how to:
- Check part size at the right features (not random spots).
- Set calipers correctly before measuring.
- Compare measurements to the control limits in the work instruction.
- Record results the same way every time.
Here’s a worker-friendly example. During training, you might practice checking a part’s diameter with calipers against a posted limit. The trainee measures, then highlights why the reject part fails, using the same words they will use on the shop floor.
Standards matter too. ISO 9001 pushes you toward a consistent quality system and documented process control. ISO 13485 brings that expectation into medical device settings with tighter links between processes and results. Even when the product is different, the mindset stays the same: follow the documented method, because the method is what makes quality repeatable.
Finally, connect the training to risk focus. QMSR 2026 stresses competence for workers whose tasks affect device quality. So, your early training should cover not just “how to measure,” but also why those checks reduce risk to safety or performance. When workers see the risk behind the rule, they slow down at the right times.
The fastest way to stop nonconforming product is to teach workers to spot it the moment it appears.
Keep Skills Sharp with Regular Updates
Even great training fades. That’s why refreshers matter, especially when processes, documents, or tools change. On the line, you can’t rely on yesterday’s habit, because today’s setup might be slightly different.
A strong refresher program uses short, frequent updates instead of rare, long sessions. When a process changes, you can run a focused training block at the moment of changeover. Then you confirm skill right away, using the same checks workers perform during production.
Because quality tools and expectations keep evolving, keep training tied to three triggers:
- Process changes (new supplier, new fixture, updated settings).
- Audit findings (repeat issues, gaps in records, unclear instructions).
- Tool or AI support changes (new inspection software, new decision rules, new screens that guide inspection steps).
If your company uses ISO 9001 or ISO 13485, treat these refreshers as part of building a stable quality culture. ISO 9001 also encourages internal audits, so you can use those audit results to shape what gets reinforced. For teams that support audits, training in how audits work can help workers understand what auditors look for, such as documentation and evidence of follow-through. For example, auditing ISO 9001 training options can support managers and quality leads as they plan refresher cycles.
Now add two improvement habits that fit production reality: Kaizen events and Six Sigma focus on waste. Kaizen works well for small, daily wins. You might run a 30-minute team session on one repeated micro-issue, like labels getting smudged or a part-handling step causing scuffs. Instead of blaming individuals, you fix the system that created the problem.
Six Sigma supports bigger reductions in variation. If a measurement trend shows drift, you can train workers on interpreting the pattern and responding with the right containment steps. Even when the team never calls it “DMAIC,” the idea stays practical: reduce defects, reduce rework, and keep output within the target.
Manager involvement makes refreshers stick. When a supervisor joins the training, workers pay attention to details and questions rise. Also, set a simple rhythm:
- Weekly: quick reminder of one quality rule.
- Monthly: one new example part (good and bad) for visual spotting.
- Quarterly: a short audit debrief that translates findings into actions.
Finally, build team culture around learning, not fear. When people can ask, “What did we miss last time?” without blame, they fix the root cause faster. That culture supports consistency, and it helps companies meet ISO expectations and FDA medical device quality expectations under QMSR 2026.
Training isn’t a one-time class. It’s the routine that keeps quality habits alive.
Make Daily Checks Your Superpower
Daily checks feel small when you’re tired and the line keeps running. Still, that routine is what keeps small problems from growing into big defects, hold time, or costly rework. When you start each shift with the right checks, you catch drift early and you keep quality steady.
Think of your day like driving with a dashboard. You don’t wait for the engine to fail. You watch the lights, you scan the gauge, and you fix the issue while it’s still minor.
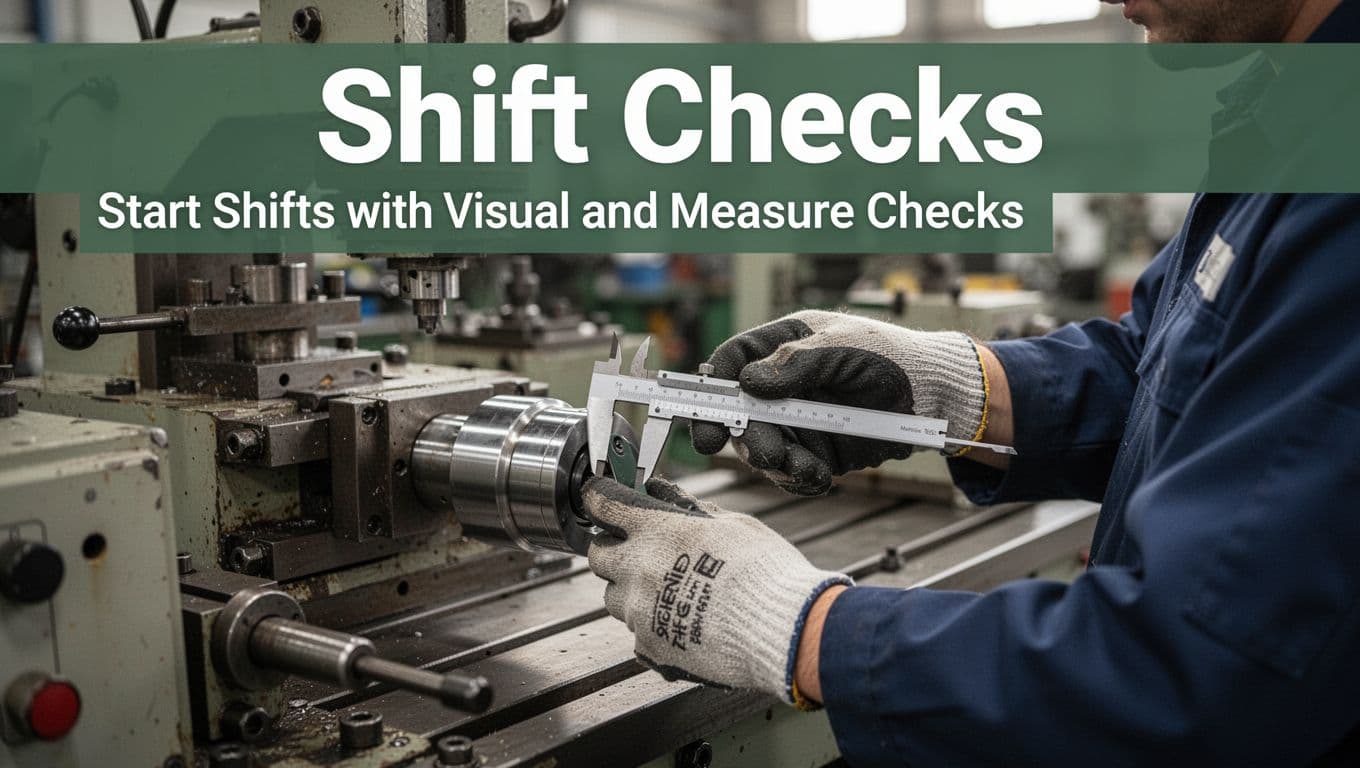
Start Shifts with Visual and Measure Checks
Before the first part hits the line, your quality routine should start with your eyes, then your tools. Visual checks catch the things you can spot fast, like damage, wrong setups, or missing labels. Measurements then confirm the numbers, because “looks right” is not the same as “meets spec.”
Here’s a solid morning flow that fits most production environments:
- Inspect machines and stations
Look for wear, misalignment, loose guards, worn tooling, and anything that suggests the process changed. Also check cleanliness. A dirty station can turn into contamination, even if the product looks fine at first. - Measure parts before full speed
Take early samples and measure at the control points listed in the work instruction. Don’t pick random spots. Instead, use the same features every time. That consistency matters for both ISO-style documentation and day-to-day defect control. - Verify supplier inputs
Confirm incoming materials match the approved specs (lot, revision, and condition). Also check packaging status and label clarity. If a supplier ships the wrong material, your machine settings alone can’t save you.
To keep this routine practical, tie each check to a simple “what good looks like” rule. For example, if a part should have a smooth surface finish, you define acceptable marks. If a bore size should be within a limit, you define the exact measurement method.
In regulated settings, these habits also support broader quality control expectations. FDA guidance for pharmaceutical production, for instance, emphasizes that production and process controls need to match the risk and the product requirements, not just the schedule. You can reference FDA’s production and process controls guidance when building your station checklists and evidence routines.
Meanwhile, consistency helps with audits. When you repeat the same morning steps, you create clean records. Those records show the line stayed in control, even when conditions changed.
Here’s a quick real-world scenario. Imagine a fixture wears down slightly after a week. At first, the part still “looks okay.” However, the surface feature on one side slowly shifts. If you measure early and compare results to posted limits, you catch the drift before you produce a full batch.
Another scenario hits in food or pharma supply chains. A lot of raw material arrives with label mismatch or a different grade. A quick supplier verification stops the wrong input from reaching production. It’s a small step, but it prevents a recall-worthy mix-up later.
In short, the best morning routine doesn’t rely on luck. It relies on visual checks, measurement discipline, and supplier verification done in the same order every shift.
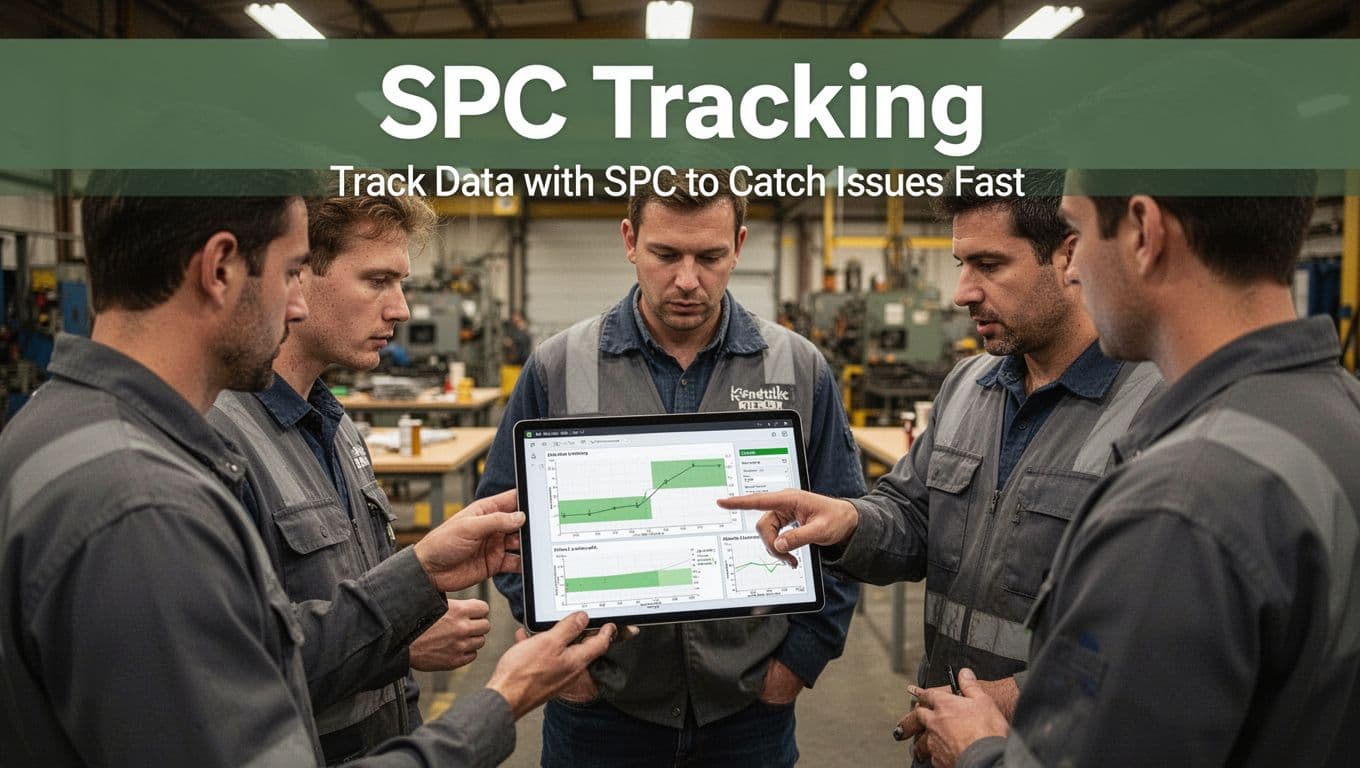
Track Data with SPC to Catch Issues Fast
After shift start checks, the line needs a way to spot trouble as it happens. That’s where statistical process control (SPC) earns its place. Instead of waiting for end-of-line test results, you watch the process data in real time. As a result, you catch emerging defects before they spread.
SPC turns raw measurements into signals. You plot them on a control chart, then you compare them to expected variation. Normal variation looks like a steady pattern. Special causes look like a change in the pattern, not just one bad unit.
To make SPC usable on the floor, keep it simple:
- Chart the right metric
Use defect rate, first-pass yield, or key dimensions that represent process health. Choose metrics that you can act on quickly. - Use alerts for out-of-control signals
When the chart shows a shift or trend, you trigger a response. That response should be pre-defined, not improvised under pressure. - Connect charts to team huddles
Review SPC signals in short meetings. Then record what you found and what you did. This links daily checks to deeper root-cause work. - Log results for audits
Your logs should show data, interpretation, and corrective actions. When ISO auditors ask “how do you know the process stayed controlled,” your records answer the question.
If you want a practical reference for how control charts and patterns work, SPC chart reading basics can help clarify what different signals mean. Just remember, in production, the real goal is action. A chart is only useful when the team knows the next step.
Here’s how it plays out with a fast defect story. Suppose your line makes a molded component and you track surface pinholes. Over a few hours, defect counts creep upward. Each individual sample might still fall within limits. However, SPC detects a trend earlier than your final inspection.
Now the team does something specific:
- Stop or slow the line if risk rises.
- Inspect the likely drivers, like mold temperature, material moisture, or air flow.
- Check the last change (tool swap, new supplier lot, maintenance).
- Take containment samples after adjustments.
- Document the cause and fix in the quality log.
That disciplined response prevents thousands of bad parts. It also reduces overtime because the fix happens once, not after repeated failures.
SPC also helps during daily management. For example, many teams run a short metric review at the end of each shift. They talk about:
- what changed on the chart,
- how big the deviation looks,
- what containment happened,
- and whether the process returned to expected behavior.
In other words, SPC data becomes a shared language. Workers can point at a chart and say, “This pattern started after that changeover.” Then the team can verify the link instead of guessing.
For regulated product lines, that data discipline matters even more. FDA places weight on current good manufacturing practice expectations and on keeping production under control. If you work in pharmaceutical settings, you can also look at Current Good Manufacturing Practice (CGMP) regulations to see how process control thinking shows up in expectations for production.
One more tip keeps SPC from becoming “chart theater.” Don’t collect data you can’t use. If you log defect counts but never act on them, the charts lose trust. Instead, agree on the action plan upfront. Then run the routine consistently.
When you do that, daily checks stop being a checklist. They become a system. You start strong with visual and measure checks, and you stay strong by tracking trends with SPC.
Grab the Right Tools to Stay on Track
When quality depends on tight specs, tools become your second set of eyes. They help you measure the product, confirm the setup, and document what happened. With the right tools and simple routines, you can move faster without losing accuracy.
Think of a production line like a kitchen during rush hour. If you grab the wrong spoon or skip the tasting step, your whole batch suffers. In the same way, your gauges, calipers, and checklists keep each “taste test” consistent, shift after shift.
Also, tools are not just for inspection at the end. They help you control the process while it runs, which is exactly how many ISO and FDA expectations show up in daily behavior.
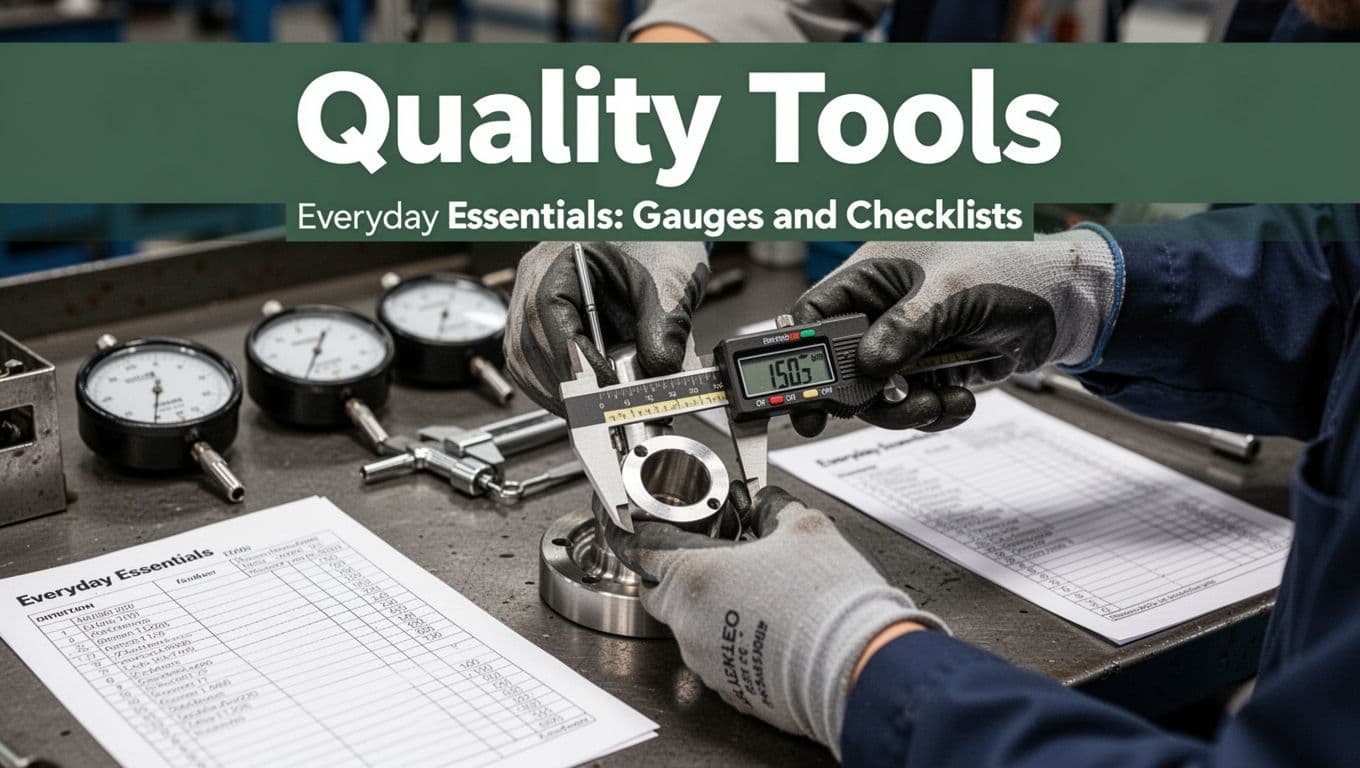
Everyday Essentials: Gauges and Checklists
Start with the basics you use every day, because most quality failures begin with small tool issues. A caliper that’s out of calibration, a gauge that’s dirty, or a checklist that skips a key step can all turn into costly scrap.
Here are common everyday essentials you’ll see in many production environments:
- Digital or dial calipers: great for lengths, diameters, and key dimensions.
- Micrometers: helpful for smaller sizes that need tighter readings.
- Go/no-go gauges: fast tolerance checks when you need a yes or no answer.
- Thread gauges (when threads matter): confirm pitch and fit quickly.
- Torque tools (like torque wrenches or screwdrivers): prevent under-tightening and over-tightening.
- Thermometers or surface temp checks (when heat affects quality): confirm process conditions.
The next piece is how you use them. Accuracy depends on more than the tool name. You also need correct handling and a repeatable routine.
Use calipers and gauges like you mean it. For speed and accuracy, I focus on habits that reduce “human slop”:
- Clean before you measure. A thin film or chip on the jaw can shift readings.
- Set the reference point (zero or datum) the same way each time.
- Measure on the right feature. Don’t “eyeball” the contact points.
- Apply consistent pressure. Too much force can deform soft parts.
- Read the scale without twisting. Keep the tool aligned to the part face.
Checklists make those habits stick. Instead of relying on memory, your checklist turns quality into a simple script. It also helps new workers learn faster, because the document shows the exact order and what counts as “good.”
A strong checklist usually covers three moments:
- Incoming materials
Verify part numbers, lot or batch IDs, and condition. Then check dimensions if your work instruction requires it. - In-process checks
Measure at control points during production, not only at the end. - Final checks and release
Confirm the product meets spec, plus any appearance or functional requirements.
To support proper tool handling and why calibration matters, you can reference caliper calibration guidance from Fox Valley Metrology. It reinforces a simple rule: don’t trust a measurement tool you have not verified.
Batch records also help here, even though they look administrative. When you record the steps as you run them, you prevent common errors like:
- missing the right adjustment after a tool change,
- using the wrong lot of material,
- or skipping a required in-process measurement.
In short, gauges give you numbers you can trust, and checklists give you the steps to produce those numbers consistently.
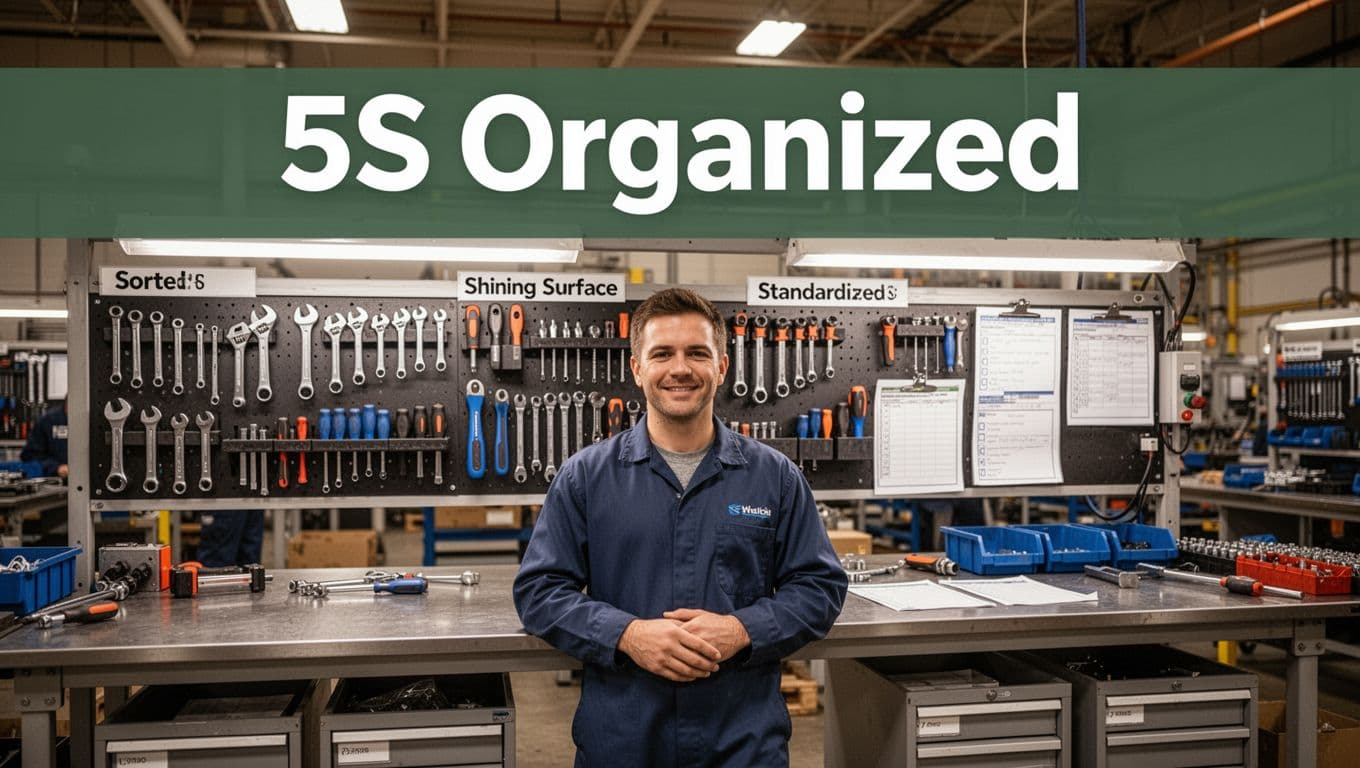
Organize with 5S for Fewer Mistakes
If you want fewer measurement mistakes, you need a cleaner, clearer workstation. That’s what 5S does. It reduces clutter, removes search time, and makes the right tool the easiest tool to grab.
In Lean terms, 5S means:
- Sort: remove what you don’t need.
- Set in order: put needed items where they belong.
- Shine: clean the area and inspect as you clean.
- Standardize: keep the same layout and rules every shift.
- Sustain: keep the routine alive with follow-through.
Here’s the production-line logic. When tools live in the same place, you stop wasting seconds. More importantly, you stop grabbing the wrong gauge. That’s how “small” errors turn into defects.
Sort: Remove the distractions
Start with Sort. Walk the station and ask, “What do we use for today’s job?” If you don’t use it, it goes. In practice, I’ve seen teams remove extra gauges, duplicate fasteners, and old printouts that no one should be using.
Also, keep the floor clear. A loose rag, a dropped part, or a chip pile can affect cleanliness and measurement accuracy. In FDA-regulated or contamination-sensitive processes, cleanliness is not optional.
Set in order: Make the right tool obvious
Next, Set in order. Use simple locations, like shadow boards or defined bins. Put:
- the primary caliper at the same spot every time,
- go/no-go gauges in the same sequence,
- cleaning tools next to the measurement tools,
- and the current checklist or work instruction within easy reach.
Then label by function, not by guesswork. When you can find a tool without thinking, you reduce human error during rush periods.
If you want a clear, practical reference, this overview of implementing 5S can help you see how teams structure the steps in real workplaces: How to Implement 5S Methodology in Manufacturing Plants.
Shine: Clean while you inspect
Shine does more than make things look good. When you clean, you also notice problems. For example, wipe down around the station and check for:
- oil leaks (which can affect cleanliness and surfaces),
- loose guards,
- worn fixtures,
- and damaged gauge surfaces.
In other words, Shine acts like a quick inspection loop. It catches issues before they appear as defects.
Standardize: Lock in the routine
Standardize is where 5S becomes quality control. You define the exact layout and the exact habits. Each shift uses the same station map and the same checklist flow.
This is especially important for regulated workflows. ISO systems reward consistency, and FDA-oriented environments need clear control of production steps. When the workstation layout and process steps stay stable, workers make fewer accidental deviations.
Sustain: Keep it from slipping
Finally, Sustain makes 5S real. Without sustain, the station slowly returns to clutter.
To sustain 5S, use quick visual reviews at the start or end of each shift. Also, train people to own their space. When workers feel responsible for the area, they stop treating it like someone else’s job.
Here’s a quick production example. Imagine a line that uses a go/no-go gauge for bore size checks. If the gauge gets buried under parts, a worker may test the wrong surface or use a worn gauge. With 5S, the gauge has a dedicated spot, it gets cleaned routinely, and the checklist confirms which gauge to use.
When 5S is done well, you get an “easy mode” for quality. Workers don’t have to remember everything. The station layout guides them. The checklist directs them. The tools measure the same way. And that is how you stay on track without relying on luck.
Boost Quality with Smart Tech Helpers
Smart tech helpers help workers do their jobs with less guesswork. They also help teams catch small shifts early, before they turn into bigger defects. In 2026, US smart factories lean on AI plus sensors for closer monitoring, so quality data stays visible all day, not just at the end.
AI Predicts Problems Before They Happen
AI works like an experienced teammate who remembers every tiny change from past runs. It scans patterns across machine signals, inspection results, and production data. Then it alerts workers when a trend looks like it usually leads to defects.
Most often, AI predictions come from machine signals like:
- vibration changes that hint at worn parts,
- temperature swings that affect material behavior,
- unusual cycle sounds that show misalignment.
Because AI learns what “normal” looks like, it can flag trouble even when single parts still pass. That’s where yield improvements start. You fix the setup while the line is still easy to correct.
Here’s a clear example. A plant runs a molded part, and surface pinholes slowly rise over a few hours. Each sample might still fall inside limits. However, AI notices the pattern in related signals (tool temp, cycle time, material moisture). As a result, the system issues an alert early, so the team adjusts the process and tightens control before more bad parts pile up.
In yield terms, this often shows up as fewer units requiring rework and fewer scrap events. Also, it can reduce “late surprises,” where the batch only fails after a long run.
If you want a simple way to explain this to line workers, compare it to weather. You might not see rain yet, but the forecast still tells you what will happen next. Then you act early, not after everything gets wet.
AI defect prediction also supports root-cause work. When the alert fires, workers can check the last change that happened before the trend started, like a tool swap or a new supplier lot. If your team wants a deeper look at how AI/ML frameworks handle defect prediction with limited defect data, see Siemens on AI/ML defect predictions.

A final benefit matters for compliance. When AI catches issues earlier, you often get cleaner records of what changed and when. That helps when you connect daily checks to ISO-style control and FDA-aligned process expectations. If you build your program around action steps, not just alerts, AI becomes a yield tool, not a noisy dashboard.
Sensors and Auto-Scanners for Real-Time Wins
Sensors give quality a fast reaction time. They also reduce the gap between “we checked” and “we controlled.” Instead of waiting for end-of-line results, smart factories monitor the process in real time.
In practice, you’ll see sensors track things like:
- heat at critical steps (tooling, sealing, curing),
- humidity in sensitive rooms (food, pharma, moisture-sensitive materials),
- airflow and pressure when they affect assembly quality,
- machine power draw and cycle time as indirect indicators of fit.
Then auto-scanners, including automated optical inspection (AOI), verify parts at speed. AOI uses cameras and computer vision to spot defects humans miss at high line rates. It can also handle repeat checks without getting tired.
A key comparison is AOI speed vs. manual checks. A worker can be extremely accurate, but their attention shifts during long runs. AOI keeps scanning at a steady pace, so it catches tiny surface issues (scratches, misalignment marks, missing components) as they happen. As a result, the line can divert suspect parts quickly, rather than discovering them later during final test.
To ground this in real expectations, AI vision inspection helps many teams find defects quickly. It also reduces the time spent on rework because fewer bad parts reach later steps. For a practical overview of how vision inspection supports real-time defect detection, check AI vision inspection for real-time quality control.
Now, sensors often do more than detect defects. They support stability. If humidity drifts, your process may produce warped pieces or weaker bonds. When sensors catch that drift early, you can correct environmental controls before quality goes off track.
For example, some plants use temperature and humidity sensors built for regulated settings. If you want an example of hardware aimed at trustworthy monitoring, you can review FDA-aligned temperature and humidity sensing. Use that as a starting point, then pair it with your internal calibration and validation steps.
Where AOI and X-ray fit in traceability
AOI handles many fast visual checks, but it doesn’t see everything. Some defects live inside the part or beneath a surface. That’s where X-ray inspection comes in, especially when you need traceability for internal voids, fill level issues, or hidden assembly problems.
When teams combine AOI and X-ray, they build a stronger quality story:
- AOI catches what’s on the outside,
- X-ray reveals what’s hidden,
- both feed the same decision rules,
- and both connect to batch or serial records.
That’s one reason software linking production to compliance matters. In 2026, many lines aim for full data visibility, where machine signals, inspection results, and release decisions connect in one place. Then the quality record doesn’t require manual reconstruction later.
Reconfigurable lines and smarter daily checks
Smart tech also supports reconfigurable lines, so you can adjust inspection coverage when product changes. Instead of rebuilding the whole quality routine, you update the inspection plan, settings, and acceptance criteria. Then the system keeps up as formats change.
Meanwhile, workers still run daily checks. They just do them with better signals in front of them. A sensor reading that looks “normal” helps confirm the process is stable. AOI results confirm that visual quality stays consistent. If something shifts, the tech tools help point you to where to look first.
Finally, this all ties back to yield. Real-time detection reduces the number of nonconforming units that progress downstream. It also shortens the time to corrective action. In short, smart sensors and auto-scanners turn quality from a last-minute verdict into an ongoing control plan.
Tackle Line Challenges Without Skipping a Beat
When the line feels stressed, quality can slip fast. However, a good system helps you stay steady, even when suppliers change, materials run tight, or yields drop. Think of it like driving in bad weather. Your route may change, but your safety checks do not.
This section focuses on two common pain points, supplier hurdles and day-to-day production instability. Then it shows how teams keep ISO-style discipline and FDA-aligned thinking intact.
Fix Supplier and Change Hurdles
Supplier issues rarely arrive as a single problem. More often, you get a mix of small surprises, lead time changes, lot variations, unclear certificates, or documentation gaps. Still, the fix starts before product hits your line. You stop bad inputs early, and you keep records that prove you did.
First, tighten supplier contracts around quality expectations. You want the agreement to spell out what changes require notice, such as:
- material grade or source changes,
- drawing or revision updates,
- changes in manufacturing location,
- new packaging formats,
- and any drift in key specs.
Also, require suppliers to provide clear documentation every time, including traceable batch or lot IDs and approval status for the material. If your internal team spends time guessing which spec revision applies, errors grow.
Next comes testing, but not random testing. Use a risk-based receiving plan that matches how the supplier input affects product quality. For medical devices, FDA’s Quality Management System Regulation (QMSR) strengthens the expectation that the quality system covers supplier controls. You can reference FDA QMSR for quality system regulation to see how the regulatory view ties controls to quality outcomes.
Then set up a practical workflow for change review, including a small sign-off chain:
- Quality reviews the change notice (what changed, why it changed, and what risk it adds).
- Engineering checks fit with the process (does the material still behave the same at your step temperatures, speeds, or pressures?).
- Production validates the plan (can the line run the material without extra handling steps?).
- Quality approves results (accept, conditional accept, or reject based on test data).
After that, run side-by-side testing when it matters. For example, if a supplier changes polymer supplier lots, you can test product behavior using your control checks, such as dimensions, appearance failure points, or functional performance gates. Compare results to your work instruction limits, not just “looks fine” notes.
Finally, close the loop with supplier performance reviews. Don’t wait for a repeat failure. Instead, track:
- on-time delivery,
- first-pass yield by supplier lot,
- number of deviations tied to supplier inputs,
- and whether certificates match actual shipments.
Here’s the ethics angle that keeps things honest. If a supplier sends a partial certificate or vague test results, your team records what you got. Then you decide, based on the evidence, whether to accept, hold, or reject. That keeps your quality story clean, even when pressure rises.
To visualize the flow, this is the kind of station discipline incoming inspection supports:
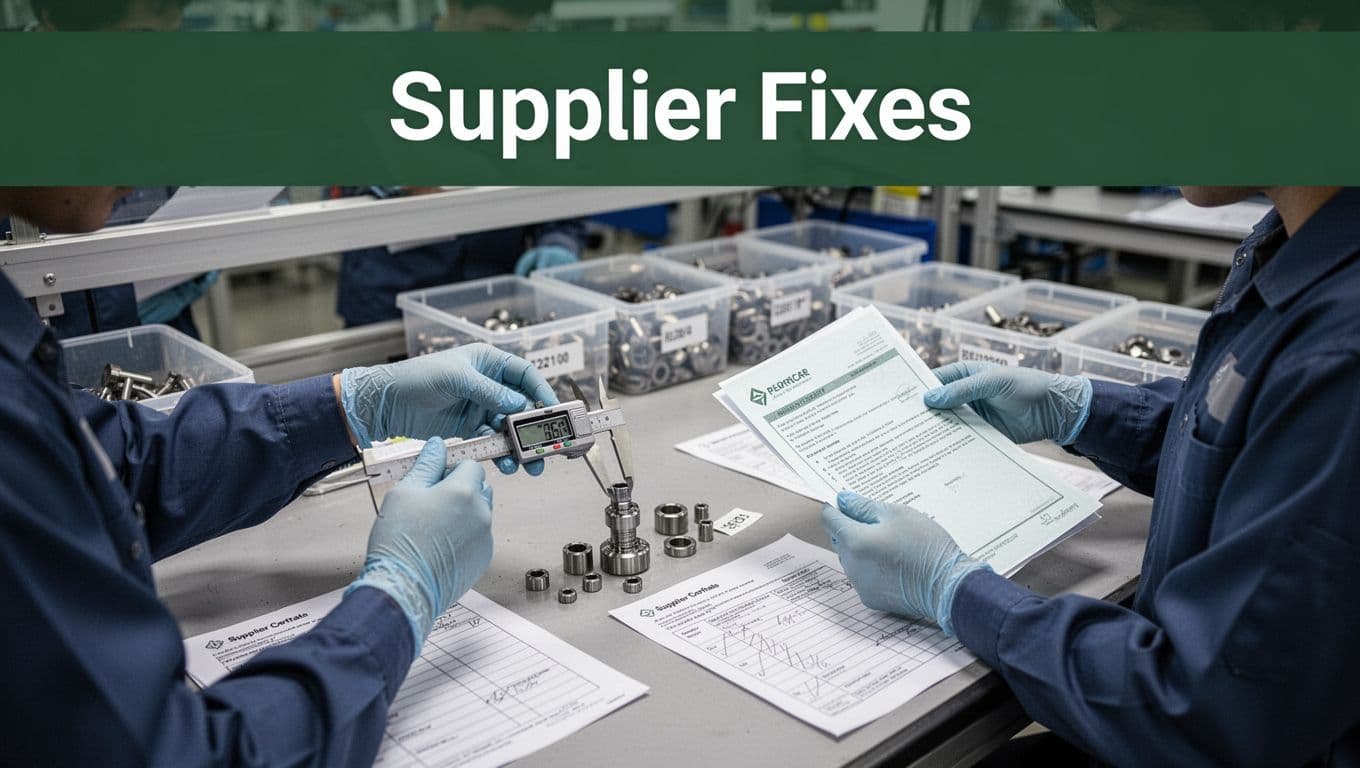
If you wait until after the line runs to “figure it out,” you pay for it with scrap, rework, and shaky records.
Beat Shortages and Low Yields
Shortages and low yields feel different, but they often share the same root cause, the line loses its rhythm. Maybe you get fewer parts. Maybe you run the same parts but at a worse setup. Either way, your team needs a plan that protects both output and quality.
Start with shortages. A shortage plan only works if roles stay clear. During tight supply windows, each person should know what to do without a long meeting. So, set a simple role split that shows up daily:
- Line lead handles schedule and decides when to slow down.
- Quality lead approves substitutions or holds.
- Material coordinator tracks what’s available (and what’s missing).
- Maintenance checks whether downtime causes low yields.
- Document owner updates records (so audits make sense).
In the real world, shortages can also tempt people to “work around” the work instruction. That’s where quality culture matters. If you substitute an input, you need a controlled change path with testing and review, not a shortcut.
Now switch to low yields. Low yield is rarely one thing. Often, it’s a bottleneck, a setup drift, or a tool or fixture issue. It can also be caused by process changes, like a new supplier input, equipment wear, or an altered environmental condition.
Here’s a practical way teams catch the pattern. Use a quick daily review that links three numbers:
- First-pass yield (how often you pass without rework),
- Throughput rate (how fast the line truly runs),
- Top defect type (what’s driving losses).
Then identify where the losses stack up. If one step has longer waits, you get a bottleneck. If one station shows rising defect rates, you get a process drift. If you see both, you likely have a constraint that also affects quality.
When your team looks for bottlenecks, start with what limits capacity. Then fix the constraint before you chase random improvements. If you want a quick framing for bottleneck thinking, see how to fix production bottlenecks.
Next, apply a simple yield goal that feels doable. Many teams use a 10% improvement goal for a short run window. The point is not perfection. It’s to build momentum and create visible progress. Then choose the right method for the cause:
- If you see more defects after a changeover, focus on setup stability.
- If the line slows down, focus on flow and bottlenecks.
- If rework rises, focus on inspection timing and containment.
A common production move is to set a “tight loop” response:
- Stop the bleeding by tightening containment when defects spike.
- Check the last change (tool swap, lot change, maintenance).
- Verify critical parameters (temperature, pressure, speed, and settings).
- Run a short pilot using controlled samples.
- Approve release only after results match acceptance limits.
Shortages make this even more important. If you run partial loads, mixed lots, or alternate materials, you still need the same proof. Your quality checks should follow the product. If the line changes, your inspection plan updates.
Meanwhile, keep your data clean for audits. When shortages force substitutions, record:
- what changed,
- what tests supported acceptance,
- and who approved release.
That documentation matters just as much as the physical work. In regulated settings, you cannot build trust on vague notes.
To keep the team aligned under pressure, the fix often starts in a tight huddle around the numbers:

At the end of the day, Lean quick wins keep morale steady and quality stable:
- 5S the bottleneck station so tools and parts stay ready.
- Standard work refresh for the next shift, especially after changeovers.
- One-point lesson for the top defect type, shared at the start of the day.
- Visual management for yield and shortages, so everyone sees the same facts.
- Kaizen on the constraint only, not on everything at once.
Do that, and you can handle shortages and low yields without skipping a beat.
Conclusion
Workers follow quality guidelines because the routine makes quality repeatable, even when the line feels busy. Through hands-on training, daily visual and measure checks, and tools plus tech that support the right decisions, they reduce scrap and protect safe, on-spec output.
They also handle real pressure better. When suppliers change, yields drop, or shortages hit, workers rely on the same core steps, data review, and controlled responses instead of guesswork. That consistency helps companies meet ISO and FDA expectations, and it helps keep products out of costly recalls.
If you want the biggest gain right now, start where it matters most: update your training refreshes and verify your shift-start checks today. Then ask your team, what part of your routine catches issues first on your line, before they spread?